I was at the point in my Shopify app development career where I need to run some Cron Jobs on my applications. This proved to be a little bit more research intensive than I had originally thought. There really isn't a standard way that Remix or Shopify recommends you to follow. Normally this wouldn't be a problem, I'd just fire up my terminal and install node-cron, set up the cron schedule and be on my way. However, this won't really work well with my current infrastructure setup. Here's my setup:
- Dockerized Remix application deployed on Fly.io
- Two machines running my application
This poses two crucial problems:
- If your application is not receiving any traffic Fly will shut it down (which saves you money 🤑) and then restarts it when it gets the next request. If your machine is shut down when the cron job is scheduled, the cron job will never run.
- Since I am running my application on two different machines, the application must be stateless. If I were to install and use
node-cronit would mean that the cron job would be executed twice on both machines and this is definitely not what I want to happen.
So how do we address these problems? We can utilize a third party service that will call an API route in our Remix application on a CRON schedule. This will ensure that even if our machine is turned off it will turn on to process the request, and only a single machine will process that request. There are a ton of third party solutions that you could use to achieve this: Upstash, Trigger.dev, Quirrel, or even Github Actions. You could also write your own service on a VPS that could accomplish this.
I really wanted to use Quirrel at the start of this, however their manage service is no longer a thing and you would have to self host the app yourself. Development also seems to have stopped for it. In this article we will be using Upstash because it is extremely simple and has a great free tier.
How to setup a Cron Job on your Remix Shopify app
Creating a Upstash Account
The first thing you need to do is go and create a free Upstash account. Upstash provides a few different services but the one that we are going to be using is called Qstash. This service allows you to do a few different things such as messaging and scheduling but we are only interested in the latter for now. Once you have your account setup you should see a page like this:
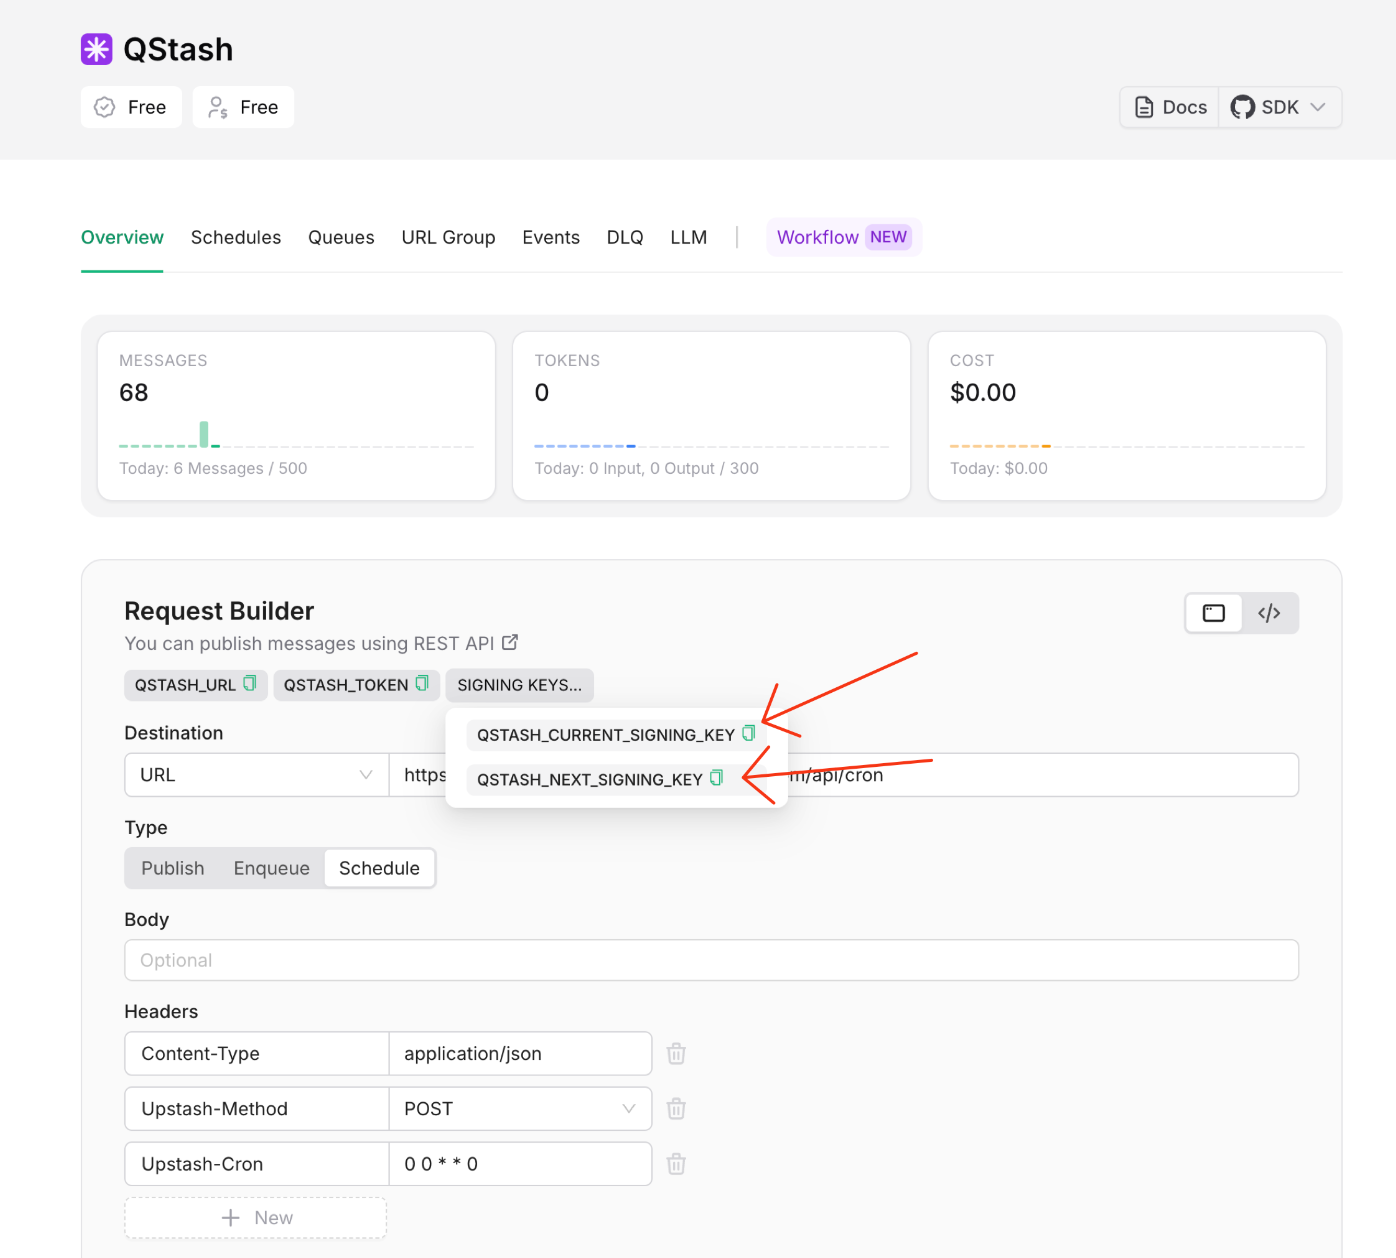
You'll want to grab your unique keys from your dashboard and save them in your projects .env. If you don't have one you can create one in the root of your project.
Setting up Remix app to Receive messages from Upstash Qstash
First thing's first. Install the qstash SDK:npm install @upstash/qstash
The way that Upstash works is by sending your Remix application a request to the specified URL on the Cron schedule that you setup. So we first need to create the route that will receive this request in our Remix app. For simplicity, the route we want to hit is /api/cron. First add a new file called api.cron.jsx inside your routes folder. Then add the following:
import { json } from "@remix-run/node";
import { Receiver } from "@upstash/qstash";

export const action = async ({ request }) => {
  // Only allow post methods. You can choose the type of methods you want to send
  // on the qstash dashboard
  if (request.method !== "POST") {
    return json(
      { success: false, message: "Method not allowed" },
      { status: 405 },
    );
  }

  // Init the receiver SDK with your keys. They can be retreived from the
  // Qstash dashboard.
  const receiver = new Receiver({
    currentSigningKey: process.env.QSTASH_CURRENT_SIGNING_KEY || "",
    nextSigningKey: process.env.QSTASH_NEXT_SIGNING_KEY || "",
  });

  const signature = request.headers.get("upstash-signature") || "";
  const body = await request.text();

  let isValid;

  // Verify that the request being processed is from Qstash
  // If it is not then we don't want to process the request
  try {
    isValid = await receiver.verify({
      signature,
      body,
    });
  } catch (error) {
    console.error(error);
    return json(
      { success: false, message: "Invalid signature" },
      { status: 401 },
    );
  }

  if (!isValid) {
    return json(
      { success: false, message: "Invalid signature" },
      { status: 401 },
    );
  }

  console.log("--- Starting Cron ---");
  // Do your work here

  console.log("--- Finished Cron---");
  return json({ success: true });
}
Scheduling Your Cron Job in Qstash
Now that we have our endpoint setup and ready to receive requests we can configure Qstash to send those requests whenever we want. On the request builder we can first set the Destination Url to our newly created endpoint.
shopify.app.toml file. It is the value for the key: application_url. You could also get this from the Shopify Partners Dashboard and then going to your app / configuration.Then we want to set the Type to schedule. The last thing we need to change is the Upstash-Cron. We can put any valid cron expression here. You can use tools like Crontab to help create valid cron expressions. Once we have everything set we can click schedule and the request will be sent based on the cron expression.

With that you should be all set to schedule all of your jobs in your Remix Shopify applications.
Subscribe to my free newsletter to stay up to date with all of my Shopify app development tutorials 🤝!
Cron & Scheduled Jobs in Remix Shopify Apps
Setting up cron jobs for Shopify apps built with Remix poses unique challenges. This guide explores why traditional methods fall short and demonstrates how to implement reliable scheduled tasks using Upstash Qstash.